Are you ready for some amazing, easy to use, developer tooling that requires not a single tooling installation and no configuration?
That's what the team at Codeanywhere are promising us with their cloud IDE when I stumbled on their website last week. They "...don't require you to engage in complex installations and configuration setups. Simply access our in-browser IDE for everything you need to build amazing websites in a productive and more developer-friendly way."
Not only that, it's a browser-based developer IDE that ties your coding directly to a pipeline of deployment using containers with immediate friendly tips to access for testing your projects.
I'm thinking we need to look at this a bit closer and wanted to share my Codeanywhere adventures here with you, starting with part one, getting started.
Full disclosure, I know some of the developers behind this product. Initially, I was using the free account they offer that you can spin from the button on the front page, but they reached out and gave me a bit more freedom to explore their offerings. Be sure to reach out to them on social media, they are a friendly bunch of developers and very happy to process any feedback you might have.How it started
This adventure started as I was exploring a replacement for the docker tooling on my local machine, which led me to the Podman tooling. A fine replacement, see my other articles on that exploration, but then I got to looking at how could we showcase our development projects and tooling using a browser only?
Enter Codeanywhere.
Feel free to browse the features of this offering on their site, no need for me to determine for you if this is the right fit. I'm interested in Java development and wanted to test this out against one of my simple process automation tooling projects, could I get this into the Codeanywhere IDE, build it, and deploy it in their container infrastructure within the bounds of my account?The dashboard
I've chosen to use the Google Chrome browser for all the articles in this series, but it should not really matter so feel free to use your favourite browser.
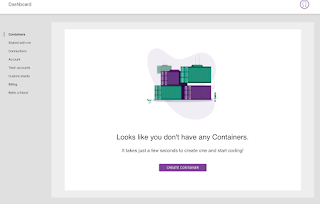
After logging in to the site, you can select the Dashboard view. It presents the view to get started and reminds you that you have not yet created your first container. When you create a container you are then staring your first development project, that's end-to-end based on language type selection which will generate a project in your IDE and link that directly to a container to be deployed when you are ready.
Before we do that, let's explore what else is available for our use.
Under the menu on the right you can select SHARED WITH ME, to see a listing that is currently empty. If you have others you work with, here is where you can share container projects with other developers and you'll find them listed for your access. Pair programming of the future, at the container level!
The CONNECTIONS item in the menu allows you to connect to SSH or FTP servers that might be hosing files, products, or projects that you want to be able to access from your IDE projects. Here is where you can add them to integrate them in the Codeanywhere IDE experience.ACCOUNT information includes the ability to connect to other developer services, view resource usage, and more.
There is also the ability to create a TEAM ACCOUNT and put together your own CUSTOM STACKS for spinning up in a container where specific tooling versions might be required.
Head back over to the CONTAINERS menu item and we'll get started in the next part of this series. So far you've taken a brief look at what this offering is, how to get it setup, and understand what you can do with it.
Next up, part two takes us on a tour of setting up our very first container development project in the Codeanywhere IDE.


No comments:
Post a Comment
Note: Only a member of this blog may post a comment.